Wednesday, September 21, 2011

MG FAZZ Sentinel version review part 2


So, here I will mention about the potential of this gundam kit in terms of it customization. I will divide it into few sections.


Articulation
Customizing the articulation (improving) is not easy especially for amateur (even myself have not try to improve or modify any articulation for my gundam kit before). But recently I found some manufacturer similar to kotobukiya that provide MSG part is making some part for improving articulation so we don't need to make or re-make joints from resin to make the kit pose better. I will try to check it out what brand the take some image of it but if anyone of you have the information related to it, you may share it and put the link in the comment. Back to the articulation customization for this kit, I feel it is not a suitable customization for this gundam kit since there are so many bulk part (arms, legs, torso, etc..) unless you plan to trim the entire proportion of the kit but it can disastrous because the originality of the kit will be spoil.  

Adding details
If you plan to add massive pla-plate, MSG part, massive drilling to expose the inner armor and scribe out lot of panel line, this will be the best kit for you to do something crazy without worry much about the weight and reduce the flexibility of the articulation (since this kit have not much). Plenty of large surface for you to add from the armors for you to add details.  If you study from the pictures, potential area will on the chest, waist armors, legs armors, arms armors and back pack. Almost everywhere of the kit is a potential area for adding details but if you plan to add anything beneath the armors, I feel it will be quite pointless.

Color Scheme or Paint
It is depend on you that what color scheme you want, go for the traditional yellow, blue, red and white or something crazy with shiny glossy pearl style or extremely matte coat style to weathering. Even though this kit is huge and come with lot of part but one good thing is most of the part can be easily paint without disassemble it into individual parts which will crush lot of your crocodile sticks. Masking this gundam kit for painting will not difficult too. I paint the MG ZZ before, most of the parts are hard to disassemble especially the legs with its complicated structures but what I do is using masking method to apply different color onto the same area. This gundam kit will a lot more easier with its armor since most of the armors come with large flat surface. 

Wednesday, September 7, 2011

MG 1/100 FAZZ Sentinel version Review part 1

First post for September and yes I’m back again. This will be the first month of collaboration in between Seven6398 and iShop2go. And the first kit in our collaboration is.. The MG FAZZ Sentinel version. Boxart, manual, runners and other part will be show in this review .Part one of the review is done and hope you guys enjoy. 
So, the MG FAZZ Sentinel version.. I don’t have much knowledge or information about this kit. All I know is it was from the Gundam S or Sentinel series. I thought that series was aired out in Japan but it only available in Manga if I’m not wrong and the MG FAZZ Sentinel version is another variation of ZZ or FAZZ gundam and it also consider as the mass production type of FAZZ.

Box Art
The box size is slightly thicker than the MG ZZ. If you own any armor messiahVF-25, the box size is quite similar to it. As what the box art show, the kit can’t pose much and it is not a very articulated kit.

Content
It come with 31 x runners, 2 x wires, 1 x mesh pipes, decal, foil stickers and 2 x screws. If anyone of you planning to own this kit, the runners that come in this kit will not follow the sequence of ABC which means some of the runners is actually replace by the new runners such as the B runners is not include in this version but replace by other runners with additional parts and label as X or Y runners. So, don’t worry if you found some of the runners are not following the ABC sequence label. There are not much decals includes in this kit but it got more foil stickers compare to the normal MG ZZ.  

Snap and fit
First of all, most of the parts from this kit are large. Don’t scare by the size of the gundam cause it is not come with tons of small little tiny parts to build all the detail in this huge kit. Even though it is a full armor version but most of the armor parts are come in one large piece. The only assembling process that is quite challenging will be the legs and the mesh pipes. In order to fit the screw into the legs, the hole for the screw must be drill to increase the diameter of the hole so the screw can be easily fit it. The screw can be fit in to the hole without the drilling process but it will be a lot harder because the screw is not made from the hard or tough metal material which the screw head can be easily spoil (the shape of “+”). It is same to those MG Strike series. In terms of the mesh pipes, the most challenging part will be fitting the end of the pipe. It shouldn’t be a problem for experience modeler who deal with mesh pipe before but if this is your first time using mesh pipe, remember don’t over cut the mesh pipe and cut it properly.

Articulation
Again, from the box art already indicate this kit can’t pose “much” even without the armor. This kit is not meant for better articulation or creates a lot of dynamic post. The origin of this kit was design for the ZZ transformation and also combination of all the mobile armors. And this sentinel version wills emphasis more on its armors and its huge hyper mega cannon. So, do not put much expectation on its articulation and please don’t hate this kit because it can’t pose because every kit have it own design concept.

Proportion
In terms of its proportion, I can’t compare it with the manga version because I haven’t read this series yet. Sometime, the real kit has better proportion from the anime or manga such as MG Freedom. What I can say about the proportion for this kit is, it look quite dynamic (not aero dynamic) in term of a armor bulk MS. I do prefer the chest armors slim a bit because this original chest armors make it look a bit too bulky. One thing that I will pick this kit which was a mass production version (FAZZ Sentinel) than the main charater version (normal FAZZ) is gundam’s face. The head design for this FAZZ Sentinel version is different than the normal FAZZ or ZZ version especially the V-fin which longer and sharper.

Gimmick
It is an old kit, we cannot expect it have gimmick like lock mechanism, LED lightning effect or other super cool inner frame detail with super dynamic articulated structure. But this old kit have it own specialty such as the structure of the cockpit and have both MS cover and MA cover at the same place when the whole thing in MS mode. The other gimmick of this kit will be the full transformation to separate individual MA mode but I think the most special gimmick of this kit will be a bulk gundam still able to plug in with a lot of huge armors.


Monday, August 15, 2011

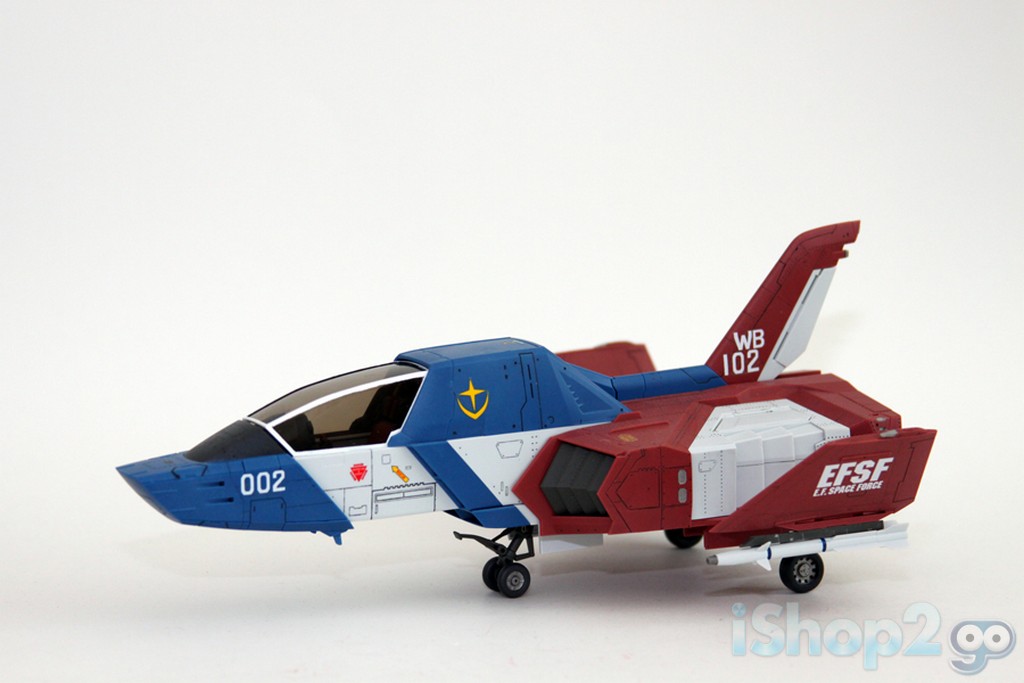
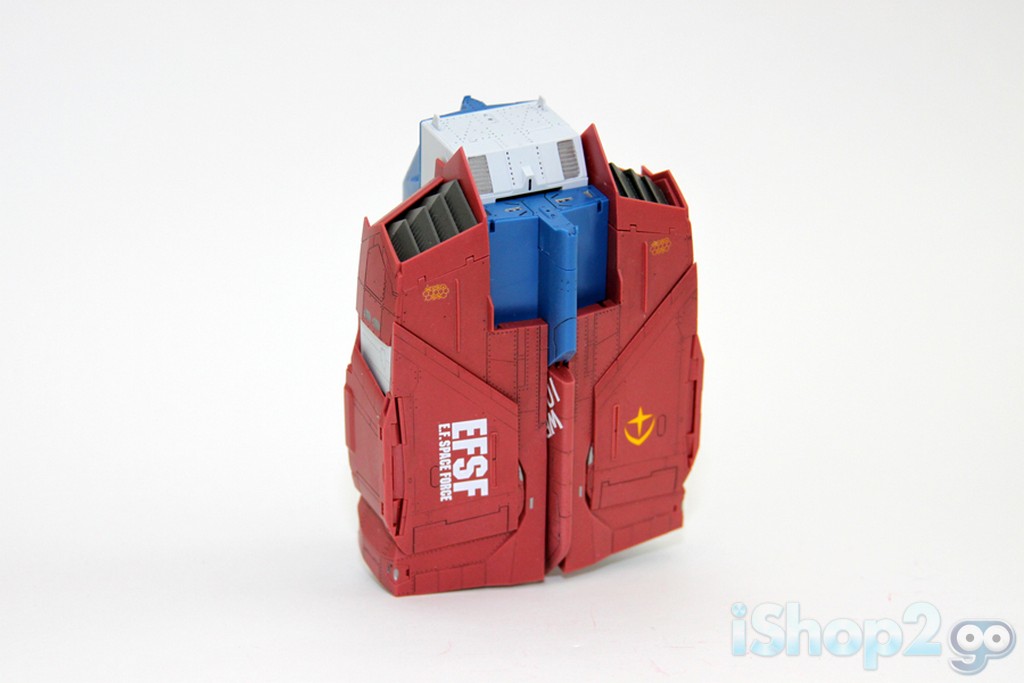
1/35 U.C. Hardgraph FF-X7 Core Fighter Review

FF-X7 Core Fighter
FF-X7 Core Fighter
FF-X7 Core Fighter

The E.F.S.F. Multipurpose Light Fighter FF-X7 Core Fighter is the newest of the U.C. Hardgraph model kit series from Bandai. It was released in February of 2011 for the retail price of 4,500yen. The previous one before the Core Fighter was released more than 2 years ago. This Core Fighter is in 1/35 scale and can transform into a core block. U.C. Hardgraphs are not known for their complexity but instead, they are known for the amount of detail you can add to the kit and it requires a bit of gluing parts together, especially with characters.

Contents of the box includes:

-Foil sticker sheet

-Waterslide decals

-8 Runners (A, B, C, D, E, F, G, H)


Unlike traditional PG, MG, or HG kits, the Core Fighter U.C. Hardgraph is given the waterslide decal bonus so there's no need to purchase separate decal sheets.


Weapons and accessories included are:

-4 small missiles per side (total of 8) hidden within the core block

-2 large missiles that attaches to the bottom of each wing

-Landing gears and wheels

-Wheel stoppers, pully and anchor

-4 character figures

-Connector for Action Base 2


The FF-X7 Core fighter is not a complicated build as it only has a total of 8 runners and many of the pieces are large frames for the kit. There's no inner frame and the panels make up the the core fighter creating hollow cavities throughout the kit. For stability purposes, the kit itself requires the use of glue, especially on each of the characters. Although the pieces are large, there are actually a lot of details engraved and embossed on the plastic allowing for hand painting and panel line wash. If you do not plan to paint the kit itself but would like to add details, the panel line wash method works best. To perform the panel line wash on bare plastic, personally, I used a water-based/alcohol-soluble paint, thinned it and painted all the grooves with black paint. Once it's been dried, I dampen a piece of tissue with alcohol and just wiped the plastic down. By performing this panel line wash method, it cleans up the paint on the surface of the plastic while leaving the paint embedded inside the grooves of the panel lines. (This is just my method of performing panel line wash. There are plenty of other tutorials on youtube and the web on how others do it as well.)


Due to the requirement of gluing certain parts together, there is very limited articulation. But the kit itself does transform between flight mode and core block mode. The cockpit shield is a smoke clear color and can be pushed back to review an open cockpit. The seat itself tilts back as the core fighter is transformed into a core block. The transformation itself is simple which only requires pushing the front portion of the core fighter in, folding it backwards, folding the two wings in, and dropping the back wing down. The landing gears and wheels itself are not built into the kit and cannot fold out. Instead, you have to manually open the panels and parts swap them in and out when posing the different modes. As for the character figures, there's an actual pilot that can sit in the cockpit, a standing Amuro Ray and Sayla mass, and a deck crew personel.


If you plan to pose the core fighter in mid-flight, you can use the connector and place the kit itself on an Action Base 2. Unfortunately in core block mode, the front tip of the core fighter is a bit longer than the whole core block itself and therefore will not stand flat, but instead, slightly tilted. For the waterslide decals, there are 3 variations for you to use. The first is for Amuro Ray, the second is for Sayla Mass, and the third variation is for the G3. Due to the lack of color variation for the plastic, this kit would greatly benefit with some paint detailing, panel lining, and a flat/matte top coat to get rid of the plastic feel and look of the kit.


In summary, although there are less runners than your typical Master Grade model kit, the FF-X7 Core Fighter requires more time and effort for it to look comparable to a straight out of box build of a MG kit. This is mainly due to the requirement of gluing some parts together, lack of color separation in some areas, especially a solid color for the character figures, and the significant number of important decals for details to make it anime accurate. Hand painting the details of the kit would also be required to make the kit look good. One unfortunate issue with the kit is that there are some loose pieces that likes to pop off. But if you were to glue them in place, it would prevent the kit from transforming between the different modes. That is my only issue with the kit. But if you plan to never transform the kit and keep it in a single mode, then this would be no issue at all. If you are willing to invest some time and energy to make this kit look nice, this kit is definitely worth picking up and becoming one of the center pieces of your collection.

you can visit:

Bandai U.C. Hard Graph FF-X7 Core Fighter

Bandai U.C. Hard Graph FF-X7 Core Fighter